Winterizing a Swamp Cooler in Phoenix: Full Checklist
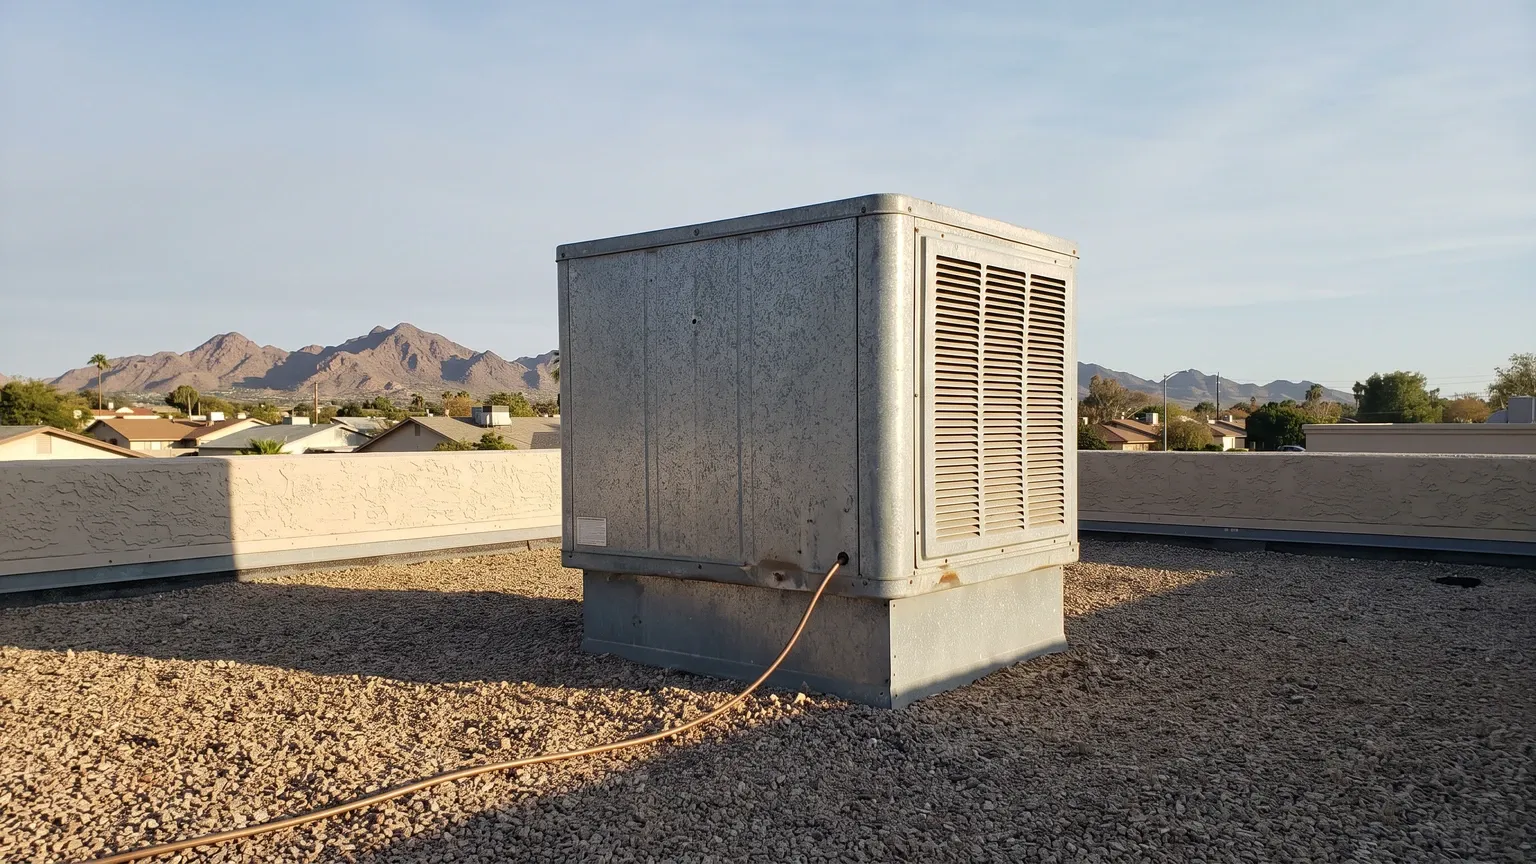
Winterizing a swamp cooler means shutting off and draining the water supply line, draining and scrubbing the reservoir, pulling or replacing the pads, drying the unit completely, clearing mineral scale, then covering it. In Phoenix, the point isn’t freeze protection — it’s keeping a cooler from spending six idle months as a covered box of standing water.
Why winterize a swamp cooler in Phoenix if it never freezes?
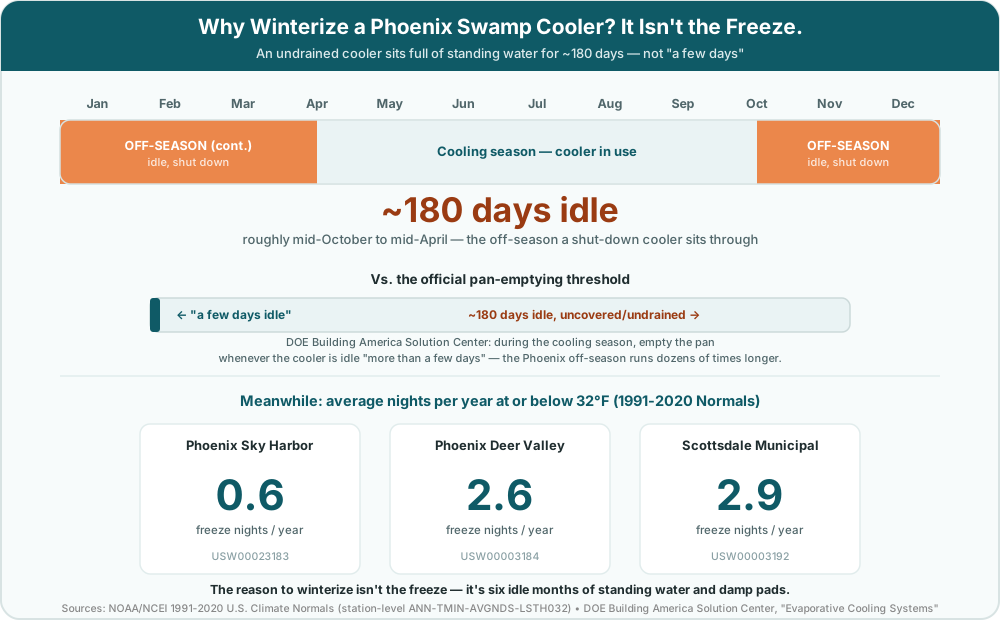
Nearly every winterizing article written about evaporative coolers assumes a cold-climate premise: drain the lines before they freeze and split. That premise barely applies here. NOAA’s 1991–2020 U.S. Climate Normals put the average number of nights per year at or below 32°F at 0.6 at Phoenix Sky Harbor, 2.6 at Phoenix Deer Valley, and 2.9 at Scottsdale Municipal Airport (the two outlying stations rest on shorter records inside the 30-year window — 20 years at Deer Valley, 17 at Scottsdale). Call it well under one freeze night a year at Sky Harbor and about three a year out at the Valley’s cooler edges. Freeze protection isn’t nothing — it’s just nowhere near a big enough reason to shut a cooler down for six months. That’s also, arguably, why so many Phoenix homeowners skip winterizing altogether — the reason everyone else does it doesn’t apply, so the job feels optional.
It isn’t optional. It’s just for a different reason, and the reason comes straight from the equipment guidance rather than the weather.
The Department of Energy’s Building America Solution Center, in its maintenance guidance for evaporative cooling systems, is specific about the cooler’s drain pan: “During the cooling season, the drain pan should be emptied whenever the cooler will be idle for more than a few days as standing water left in the pan can become a breeding ground for mosquitos and bacteria, including Legionella (the cause of Legionnaires’ Disease).”
Read that threshold again: a few days idle. Now count how long a Phoenix cooler actually sits idle once cooling season ends. Roughly mid-October to mid-April — call it six months, about 180 days. That’s the arithmetic that matters here: even in-season, the threshold for emptying the pan is measured in days, and the Valley’s off-season runs dozens of times longer than that. The freeze-protection premise other winterizing guides lean on barely applies in the desert. The standing-water premise applies for half the calendar year.
This is the same low-desert paradox that runs through the rest of Phoenix mold risk: the climate that supposedly protects a house from moisture problems is exactly what makes the real drivers — AC condensate, monsoon intrusion, and yes, an idle swamp cooler — easy to overlook. Our mold in the desert guide covers the full picture; this page is about the one driver that’s entirely inside your control and fixed with an afternoon of work.
What actually happens inside an undrained cooler over the winter?
An evaporative cooler is built around water and an absorbent pad by design — that’s the mechanism that makes it cool the air. Left undrained, the same design becomes a maintenance problem instead of a cooling one. Our swamp cooler mold guide covers the in-season version of this in full; here’s the short version for the off-season.
The pads are cellulose, fiberglass, or aspen fiber — porous, absorbent, and made to hold water, and the common cellulose and aspen types are organic material as well. A pad that goes into winter still damp, sealed inside a closed cabinet with no airflow, stays damp far longer than it would in the open. The reservoir holds whatever water is left in it, and if the drain plug stays in, that water just sits: no circulation, no fresh supply, no evaporation to speak of once the fan is off. Add six months, some organic dust that settled in over the summer, and a dark cabinet, and you have the conditions for biofilm and mineral scale to build on the tray and around the float valve — plus the standing-water risk the DOE guidance already names.
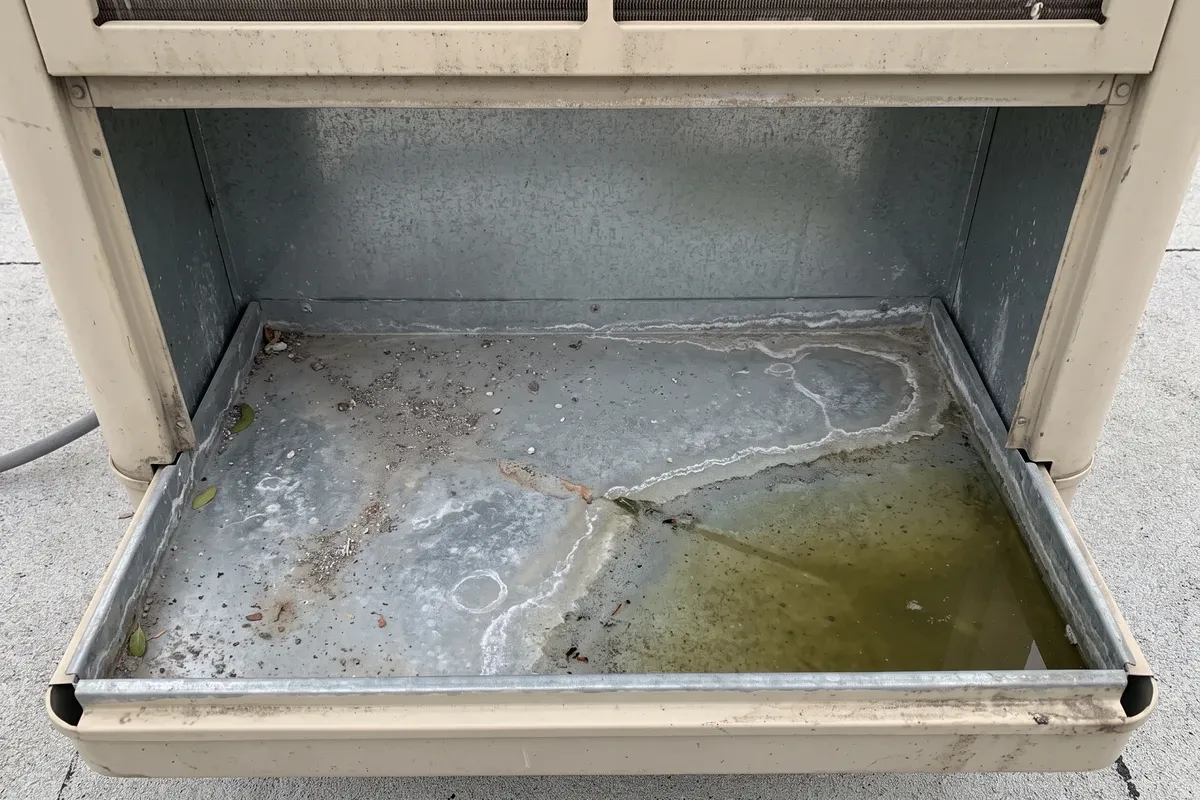
The EPA’s guidance on mold and moisture is straightforward on the underlying condition: no mold grows without water or moisture, and the key to mold control is moisture control. A cooler pan is a small, contained version of that same equation. None of this means every un-winterized cooler grows something dangerous — it means the conditions line up in a predictable way, and it’s why the first sign homeowners notice is almost always a smell, not a stain.
When should you shut a Phoenix swamp cooler down?
There’s no fixed calendar date for this, and treating it like one misses the actual rule. The real trigger is the switch away from cooling demand — in the Valley, that’s typically some point in October, as overnight temperatures drop and households move over to refrigerated AC or simply stop needing either system as much. Our Phoenix mold risk calendar maps how the Valley’s moisture drivers shift through the year, and the swamp-cooler off-season lines up with the tail end of that shift.
The better way to think about timing: shut it down whenever it’s genuinely done for the season, and don’t let “done for the season” quietly turn into “idle for a few days” without the pan getting drained. If you switched to AC mid-monsoon because the humidity made the cooler useless — a pattern our swamp cooler vs. AC guide walks through — and never went back to the cooler, that unit has effectively already started its off-season, whatever the date says.
The step-by-step swamp cooler winterizing checklist
The sequence below follows the Department of Energy’s winterizing guidance for evaporative cooling systems — shut off the water line, drain the pan, dry completely, remove mineral deposits, then cover the unit and close the dampers — with a few practical steps added (killing the power first, clearing the supply line, pulling the pads) and the scrubbing done before the final dry-out rather than after. Each step exists for a specific reason — skipping the order (especially covering before drying) is where most winterizing jobs go wrong.
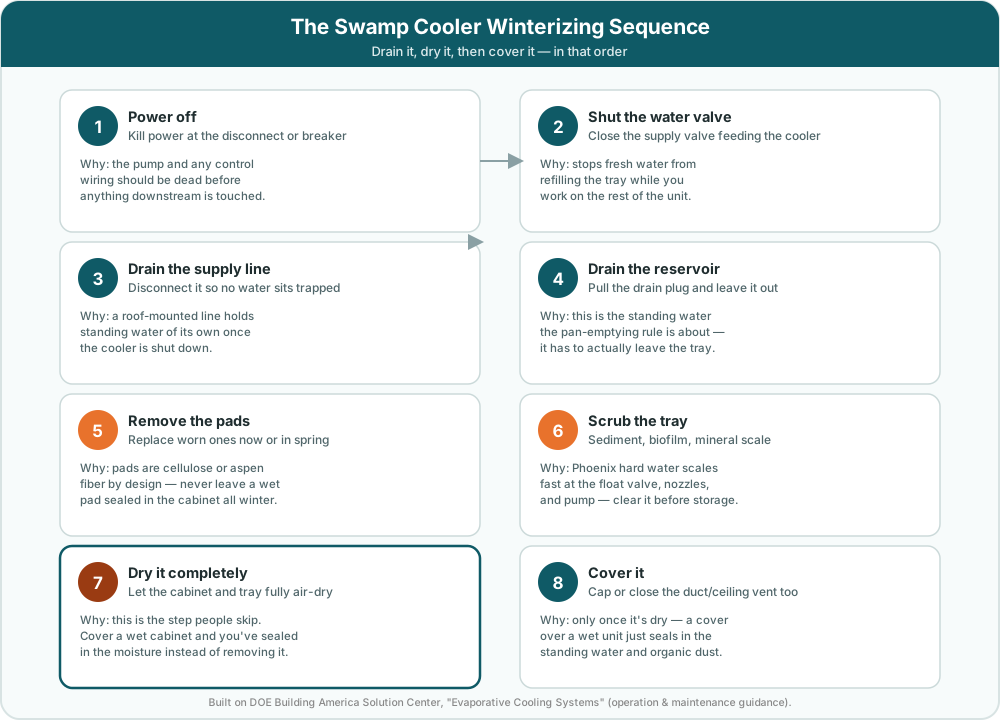
- Turn off power to the cooler at the disconnect or breaker, so nothing downstream is live while you work.
- Shut off the water supply valve feeding the cooler, so no more water enters the tray.
- Drain and disconnect the supply line so no water is left trapped in it — a roof-mounted line holds its own standing water once the cooler is off.
- Drain the reservoir and sump completely. Pull the drain plug and leave it out through the off-season.
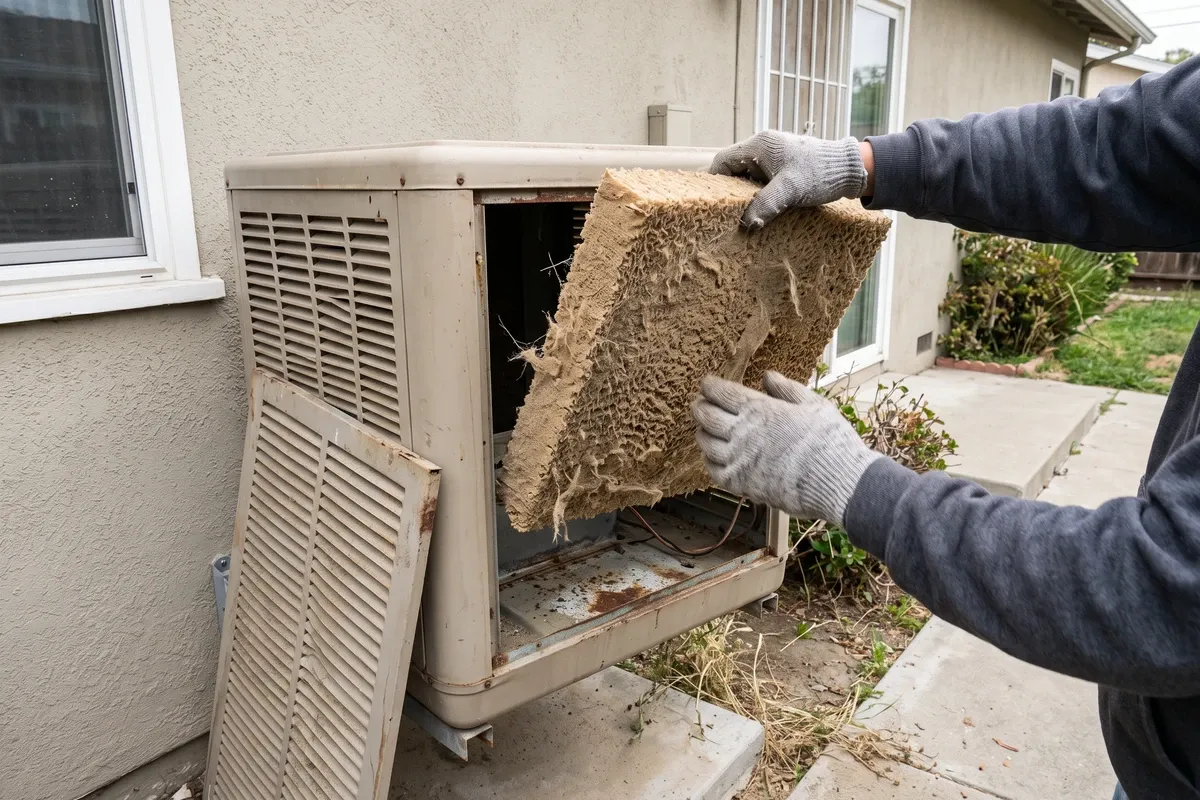
- Remove the pads. Replace worn ones now, or plan to at spring start-up — either way, never leave a wet pad sealed in the cabinet.
- Scrub the tray. Clear sediment, biofilm, and mineral scale, paying particular attention to the float valve, nozzles, and pump — Phoenix’s hard water (the city reported total hardness of roughly 10 to 16 grains per gallon in its 2021 water quality report) scales fast.
- Dry the cabinet completely before anything goes back on or gets covered. This is the step people skip, and it’s the one that matters most.
- Cover the unit, and cap or close the duct or ceiling vent it feeds, so the house isn’t venting through an idle appliance all winter.
Cover it or leave it open? (and the mistake most people make)
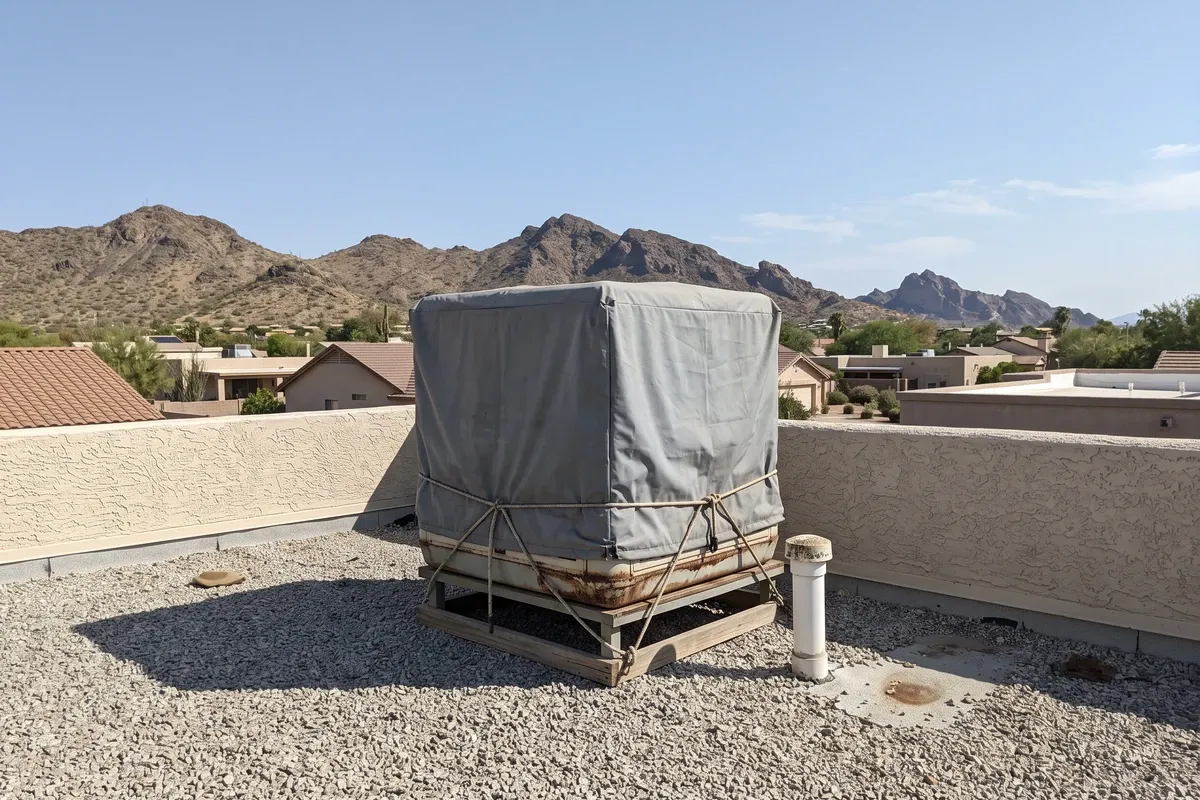
Cover it — but only after steps one through seven. The order matters more than the cover itself.
The mistake is sequence, not intent. Most people who winterize their cooler do mean to drain it first; what actually happens is the drain plug comes out, some water runs off, and the cover goes on the same afternoon before the tray and pads have had time to fully dry. A cover installed over a tray that still holds moisture does close to the opposite of what the homeowner thinks it’s doing: instead of protecting a dry unit from weather and dust, it seals a wet, dark, dust-fed box for the entire off-season — the exact conditions the drain-it step was supposed to prevent.
The fix is patience, not more equipment. Drain it, let it sit open and dry for a day, confirm the tray is actually dry (not just drained), clear the mineral deposits, and only then put the cover on. It costs nothing but a little time, and it’s the difference between a cooler that opens clean in spring and one that doesn’t.
What to check when you start it up again in the spring
Spring start-up is where a good winterizing job pays off, and it’s also the fastest way to tell whether last fall’s shutdown actually got done right.
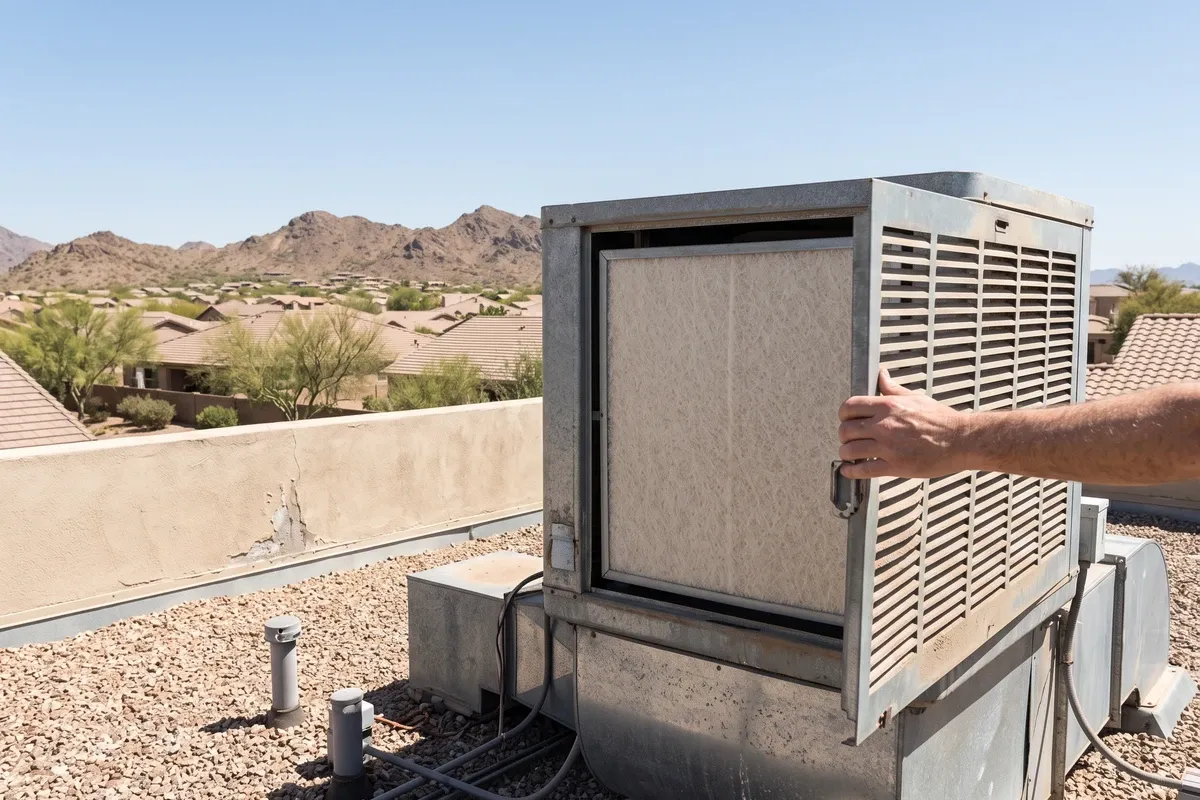
- Reinstall or replace the pads. If they came out dry and intact in the fall, a visual check for scale or matting tells you whether they’re good for another season. If they went in wet or were never removed, replace them.
- Check the tray and float valve for mineral scale or residue that built up over the winter, and scrub it out before refilling.
- Confirm the pump and bleed-off/purge system work once water is back on — a purge system that isn’t cycling lets mineral scale and biofilm build up fast in Phoenix’s hard water.
- Run the smell test. Turn the unit on and pay attention to the first few minutes of airflow. A faint dusty smell that clears quickly is normal after months of storage. A persistent musty or moldy odor usually means the tray or pads didn’t dry fully before the cover went on last fall.
- Know the line between “clean it” and “call someone.” New pads and a scrubbed reservoir solve most spring odors within a day or two of running the unit. If the smell is still there after that, or you’re now noticing it inside specific rooms rather than just at the cooler, the moisture likely isn’t in the cooler anymore.
When the musty smell isn’t the cooler
Sometimes the cooler checks out clean — new pads, dry tray, no scale — and the musty smell is still there when the weather turns humid or the AC kicks on. When that happens, the moisture that caused it went somewhere else in the house: a condensate line, a roof penetration from last monsoon, a slow leak nobody noticed over the winter.
That’s a different problem than a cooler maintenance job, and it’s worth treating it that way rather than guessing. A professional mold inspection traces where moisture actually reached indoor surfaces and confirms whether there’s growth to deal with, and our mold remediation page covers what the fix looks like once the source is identified. You can also browse the full library of Phoenix mold guides for the specific moisture source you’re chasing.
If your swamp cooler is due for its end-of-season shutdown, the checklist above covers it start to finish — most homeowners can do the whole thing in an afternoon. If you’ve already cleaned the cooler and the musty smell hasn’t cleared, that’s the point where it’s worth having someone look at the house rather than the appliance.
Sources
- U.S. DOE Building America Solution Center (PNNL) — Evaporative Cooling Systems: the winterization sequence (shut off the water line, drain and clean the pan, install a winter cover; drain and dry completely and remove mineral deposits, especially at jointed or moving parts, the water spray nozzles, and the tray), the cooling-season rule to empty the drain pan whenever the cooler will be idle more than a few days because standing water can breed mosquitos and bacteria including Legionella, twice-yearly maintenance at spring start-up and winter shutdown, and the bleed-off valve for high-mineral water.
- NOAA / NCEI — 1991–2020 U.S. Climate Normals: average nights per year at or below 32°F (element
ANN-TMIN-AVGNDS-LSTH032) — Phoenix Sky HarborUSW000231830.6 (28-year record), Phoenix Deer ValleyUSW000031842.6 (20-year), Scottsdale MunicipalUSW000031922.9 (17-year). - U.S. EPA — A Brief Guide to Mold, Moisture and Your Home: no mold grows without water or moisture, and the key to mold control is moisture control.
- CDC — About Mold: the symptoms mold exposure can cause, and who tends to react more strongly.
- City of Phoenix Water Services — Annual Water Quality Reports: total hardness of the primary Phoenix system, reported as roughly 10–16 grains per gallon (173–278 ppm) in the 2021 report.