Bath Fan Venting Into Attic: Check
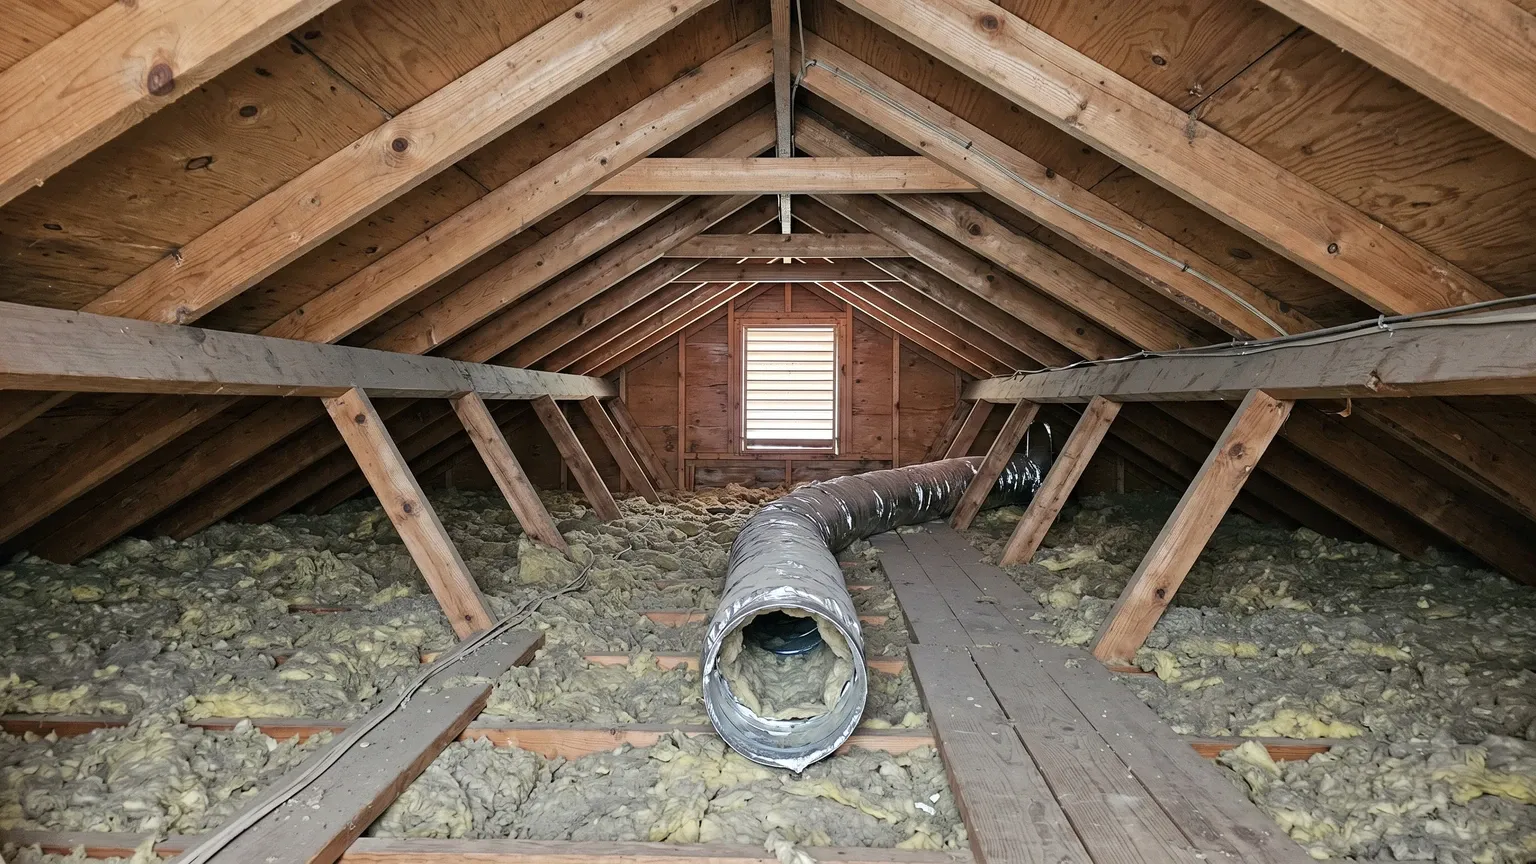
A bathroom exhaust fan venting into the attic sends every shower’s humid air onto the roof decking, where it condenses and grows mold. Three checks confirm whether yours is wired correctly: trace the duct in the attic, find the exterior cap, and feel for airflow at that cap while the fan runs.
Why this matters in a Phoenix attic
The problem is simple physics. Shower air is warm and loaded with water vapor. Roof decking is cooler than that air, especially at night. When warm humid air hits a cooler surface, it gives up its moisture as liquid water. In a connected, ventilated house that water dissipates. In an attic with a bathroom duct dumping into it, the same moisture settles onto the wood underside of the roof deck on every shower for months or years.
Wood that stays damp in a dark, low-ventilation space grows mold. In Phoenix, attic mold is already driven by AC condensate, monsoon roof leaks, and temperature swings that can push the attic to 140°F by afternoon before cooling sharply at night. A mis-terminated bath fan adds a third daily moisture pulse on top of those existing drivers.
This is also a code issue. IRC M1507.2 requires that mechanical exhaust air (bath fans, range hoods, dryers) terminate to the outdoors, not into a concealed space such as an attic or crawl space. A soffit discharge fails the same test in practice, because soffit vents pull that humid air straight back into the attic. The intent is exactly what the problem demonstrates: moisture trapped in a concealed space causes structural damage.
The three checks
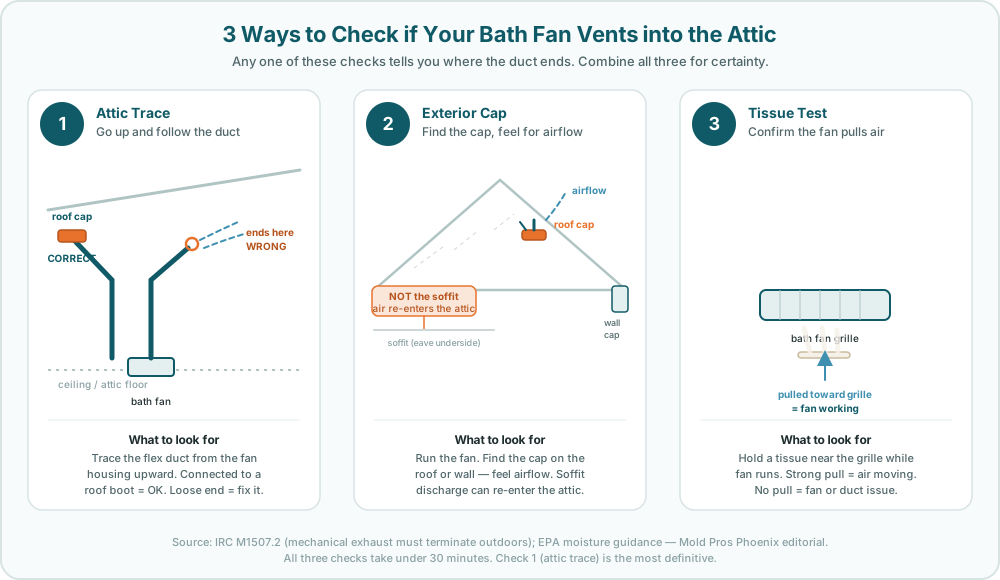
Check 1: Attic trace
This is the most direct method. Go into the attic with a flashlight and find the bathroom exhaust fan housing, which sits in the attic floor (ceiling from below). A flex duct or rigid duct runs from the housing upward.
Follow it to its end.
If the duct ends inside the attic space with an open mouth pointing at insulation or hanging free, it is venting into the attic. The problem is confirmed. You do not need to run the fan or do anything else.
If the duct connects to a metal boot fitting at the roof deck, or runs through the attic wall and out through the side of the house, it is likely correctly terminated. Check that the connection at the boot is intact and that the duct is not kinked or crushed, which can restrict airflow almost as much as a disconnected duct.
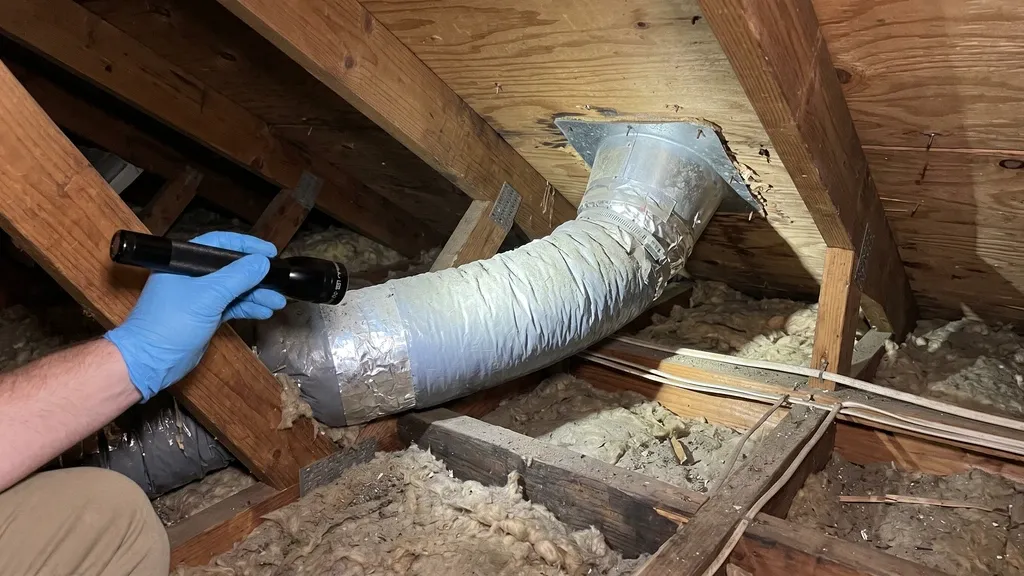
One thing to check even on a connected duct: make sure the flex duct runs with some slope toward the outside so condensation inside the duct drains outward rather than back into the fan. A sagging loop creates a low spot that collects condensate.
Check 2: Exterior termination cap
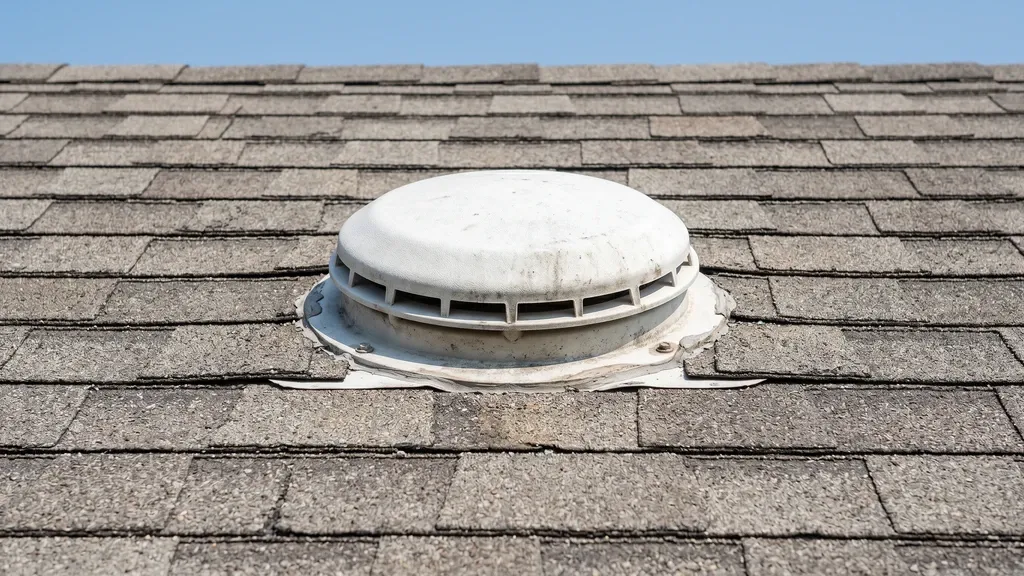
While the fan runs, go to the roof or walk the eave line and look for a round plastic or metal cap, typically 3 to 4 inches in diameter. A functioning cap has a damper flap that opens when the fan is running.
Hold your hand near the cap opening. You should feel a steady stream of air.
Two things can go wrong here even when a cap exists:
No airflow at the cap. This can mean the duct has separated somewhere in the attic between the fan and the cap, even though the cap itself is present. A disconnected joint mid-run dumps moist air into the attic space just as much as a missing cap.
Soffit termination. Some installations run the duct to the underside of the roof overhang (the soffit). A discharge into the soffit is not a correct termination. Soffit vents draw outside air into the attic for ventilation, so humid air discharged into the soffit cavity can immediately re-enter the attic through those vents. That fails the code’s core requirement to discharge outdoors (IRC M1507.2), because the soffit vents pull the humid air right back into the attic. Look for a cap above the soffit line on the roof surface or on the wall.
Check 3: Tissue test at the grille
Turn on the fan and hold a single tissue against the bathroom ceiling grille. A working fan with a connected duct will pull the tissue visibly toward the grille.
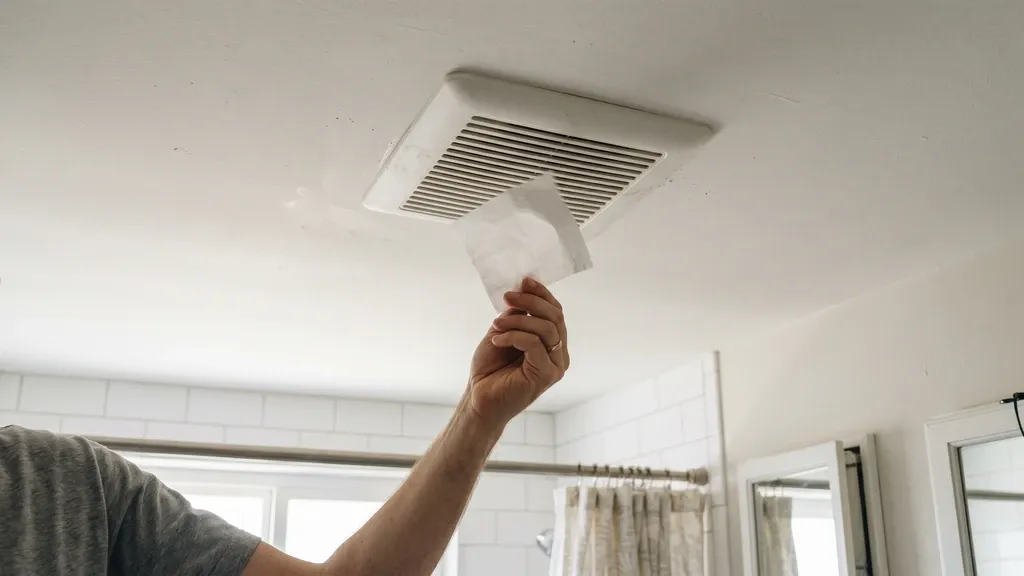
This check has limits. It tells you the fan is pulling air, but it does not tell you where that air goes. A fan can pass the tissue test and still be venting into the attic if the duct separates above the ceiling but below the roof. Use Check 3 in combination with Check 1 or 2, not as a standalone.
If the tissue barely moves, the fan itself may be underpowered (a common issue in older homes where 50 CFM fans are insufficient for today’s shower enclosures), or the duct may be kinked, crushed, or too long. Both problems reduce the fan’s ability to move humid air out of the bathroom, whether or not the duct is connected to a cap.
What correct termination looks like
A properly installed bathroom exhaust duct runs from the fan housing in a short, sloped path to a dedicated cap on the roof surface or on an exterior wall above the soffit line. The duct should be insulated, particularly in an attic space, so that temperature differences between the duct interior and the surrounding attic air do not cause condensation inside the duct.
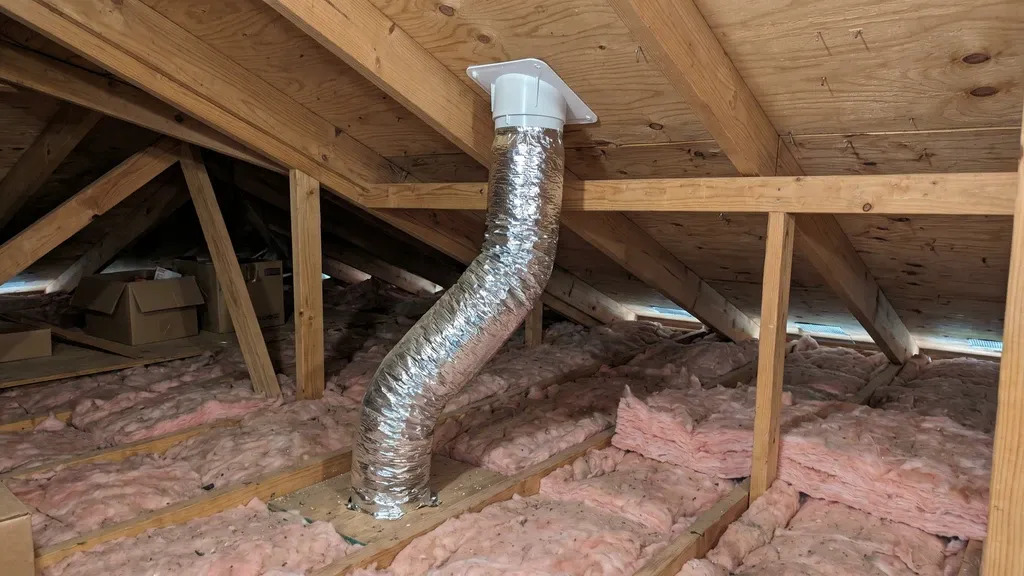
The cap itself should have a damper that closes when the fan is off, so cold or hot outside air does not flow back into the house through the duct.
Common mistakes to look for during the attic trace:
- Duct separated at a joint mid-run, with only the downstream section connected to the cap
- Duct routed to a gable soffit vent (re-enters the attic)
- Duct crushed by insulation that was blown on top of it
- No duct at all — the fan is just open to the attic through a hole in the ceiling drywall
This defect is extremely common in older Phoenix construction and also shows up in new builds, where it is an IRC M1507.2 code violation that should be caught on the punch list. The new-construction mold guide covers bath-fan termination as one of the most frequently missed defects in new Phoenix homes.
What happens if the duct is wrong
When a bath fan vents into the attic, the moisture accumulates on the closest cool surface: the underside of the roof sheathing. Early signs are faint discoloration or a slightly musty smell when you open the attic hatch. Over months, visible mold establishes on the OSB decking and begins to spread along the grain of the wood.
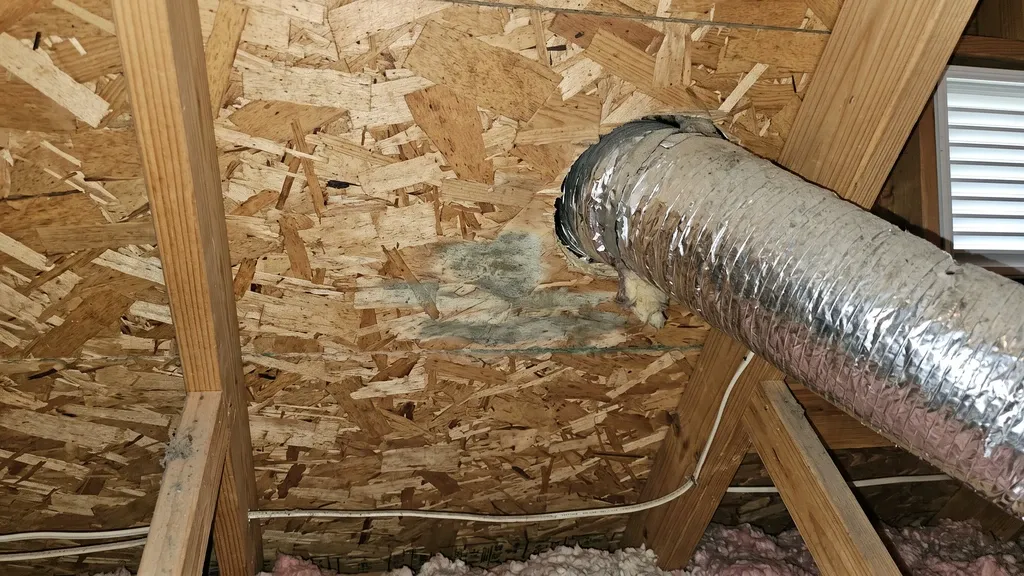
The mold itself is the visible problem. The structural risk is the wood underneath it. Sustained moisture softens OSB decking and leads to delamination over years. Remediation at the early mold stage is primarily surface treatment. Once decking is soft and failing, replacement is involved.
For context on the broader attic mold picture in Phoenix, including the other moisture sources that can compound a mis-terminated duct, see the attic mold guide. And if you find mold during this check and are not sure of the scope, a professional mold inspection can assess the affected area with a moisture meter and tell you exactly what you are dealing with before you commit to a remediation approach.
The repair
Rerouting a bath fan duct to a proper exterior cap is a manageable repair. The basic steps: disconnect the existing duct at the fan housing, run a new insulated flex duct (or rigid metal duct) along the shortest path to the roof or wall, install a 4-inch cap with a damper at the exterior, connect the duct at both ends, and seal around the cap with flashing.
Most HVAC technicians and general contractors can do this in a few hours. If the attic already shows mold from a long-running termination error, the duct repair comes first but the mold still needs to be addressed separately. Fix the moisture source, then remediate what it caused.
Get a mold check if you found growth
If your check found mold on the roof decking, or the attic smells musty but you cannot locate the growth, a professional mold inspection tells you the actual scope. A free, no-obligation quote is there if you want one, with no pressure.
Browse all Phoenix mold guides for more on moisture sources, inspection processes, and what remediation involves.